
Last year it finally became possible to have actionable toast notifications in PowerShell… as long as you were running PowerShell 7.1 and above. This was a super cool development—and I was over the moon with it—but the PowerShell version limitation always loomed and was a downer of a caveat when I was demoing the new feature.
That changes now (or more accurately soon™)!
The Groundwork
First of all. What’s changed, what was so dramatic of a development that it prompted a re-write of BurntToast?
In short, the release of the Windows Community Toolkit v7.0 in March.
To follow along with the examples in this post, you’re going to want to grab the latest Microsoft.Toolkit.Uwp.Notifications NuGet package (strictly speaking, anything above v7.0.0 will work.)
Hit up the download package link, unblock the download, and extract the contents of the nupkg file (treat the file like a zip archive, 7zip will work natively but if in doubt rename the file to .zip.)
If this is your first time looking into a nupkg, you’ll be forgiven for feeling a little lost.
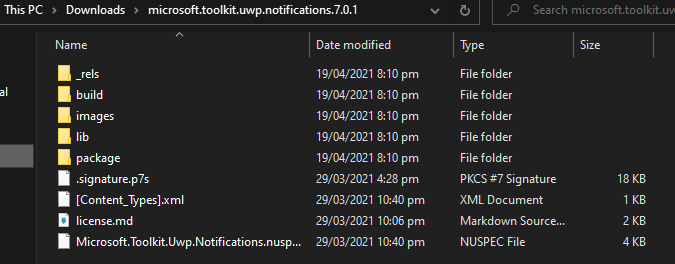
You’re looking for a DLL under the lib directory. Though it’s not as simple as that. You’ll see that there are a number of different options there.
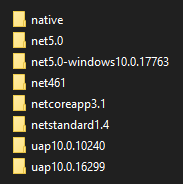
Things get a little complicated at this point. The version of PowerShell you’re running dictates which version of the DLL you’re going to need and whether any additional resources are needed. (This complexity is the reason BurntToast exists… so no one has to worry about the complexity unless they really want to!)
To keep things simple, I’ll be assuming that we’re using Windows PowerShell. With that in mind, you want to grab the dll from the net461 directory and store it somewhere convenient. I’ll be assuming it is stored in C:\Toolkit\.
Once you’ve copied that file, you should be able to import it into your current session:
Add-Type -Path 'C:\Toolkit\Microsoft.Toolkit.Uwp.Notifications.dll'
No errors? Awesome, it’s time to crack on!
Baby Steps
It’s worth reading the previous post before we get going so that you know where we are coming from.
Before we dive into actions and events, let’s just use the updated Windows Community Toolkit to get a toast on screen. The methodology is different than it used to be and seeing a simpler example will help some BurntToast design decisions make more sense.
We start with a “Toast Content Builder”, this is the base from which we build up our toast notification:
$ContentBuilder = [Microsoft.Toolkit.Uwp.Notifications.ToastContentBuilder]::new()
From there we can just start adding, via methods, the elements we want on our notification. So let’s say we wanted three pieces of text:
$ContentBuilder.AddText("The Future is Exciting!")
$ContentBuilder.AddText("This toast is using Windows Toolkit v7")
$ContentBuilder.AddText("It's a game changer!")
Need an App Logo? No Problem:
# Download this blog's fav icon and use it on the toast
$AppLogo = 'C:\Toolkit\ToastIT.png'
Invoke-WebRequest -Uri 'https://toastit.dev/images/favicon.png' -OutFile $AppLogo

$ContentBuilder.AddAppLogoOverride($AppLogo)
How about a Hero Image?
# Download toast photo by Manki Kim on Unsplash.com
$OnlineImage = 'https://images.unsplash.com/photo-1505491589101-5c7976eeb482'
$HeroImage = 'C:\Toolkit\Toast.jpeg'
Invoke-WebRequest -Uri $OnlineImage -OutFile $HeroImage

$ContentBuilder.AddHeroImage($HeroImage)
Alright, we’re happy with our notification. So now we need to mess around with App IDs and notifications managers, ergh… not anymore! Just tell Windows that your toast has been built and it’s ready to show:
$ContentBuilder.Show()
THAT IS SO MUCH SIMPLER THAN IT USED TO BE!
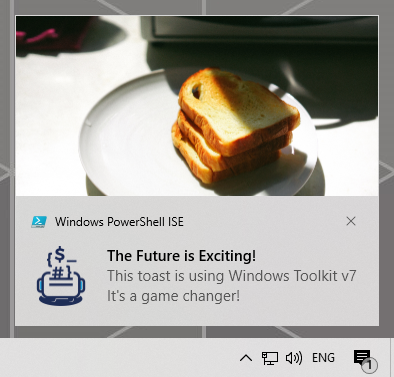
What you’ll notice is that the toast has been attributed to PowerShell ISE, which was the editor I was running the demo code in (just driving home that this works in Windows PowerShell 5.1!)
When running the code, you’ll also notice that the various .Add* methods are outputting Toast Content objects as you run them. This allows you to chain together methods, though at this point I would just suggest adding a $null = to the start of each line.
You’ll also notice that using the content builder, you start with a shell and fill it with what you want to display. This differs from how BurntToast currently works where you start from the other direction; creating the elements you want to display then adding them to the containers they belong in.
This method is much easier to follow (or will be once BurntToast has hidden away some of the .NETness.
Call to Action
So now we get to the main event, and likely the reason you’re actually reading this post.
If you’ve seen actionable toast previously, you’ll know that currently you lodge an action against an individual toast. Each new toast that needs to use that action, you need to provide the desired action.
That flow should still be possible (I haven’t actually tested it), but now what you can do is register an action session wide. That means you only have to register an action once and then all toasts created in that same session will be able to use it.
To make this work, we create a “compatible” notification manager, and register our event against that.
$CompatMgr = [Microsoft.Toolkit.Uwp.Notifications.ToastNotificationManagerCompat]

Register-ObjectEvent -InputObject $CompatMgr -EventName OnActivated -Action {
    Write-Warning "Caught an event"
    $Global:ToastEvent = $Event
}
In this example we’re outputting a warning, which is just a nice way of showing that the event has triggered, and then presenting the event data back to you as a global variable so that you can inspect it.
Next, we’ll create a new toast. Note that I’m “adding” some arguments to it, which we’ll have a look at later in the event data.
$ContentBuilder = [Microsoft.Toolkit.Uwp.Notifications.ToastContentBuilder]::new()
$ContentBuilder.AddArgument("Action", "BodyClick")
$ContentBuilder.AddArgument("ToastID", [guid]::NewGuid().Guid)
$ContentBuilder.AddText("Call to Action")
$ContentBuilder.AddText("This is really cool, I can trigger events!")
Before we go and run this, let’s add a couple of buttons. Note I’m using two different things to create the buttons here. First, I’m just providing the details of the button to the .AddButton method. Next, I’m creating an entire button object and passing that in through the exact same method.
$ContentBuilder.AddButton('Action!', 'Background', 'ButtonClick')
$ContentBuilder.AddButton([Microsoft.Toolkit.Uwp.Notifications.ToastButtonDismiss]::new())
And finally, we show the toast.
$ContentBuilder.Show()
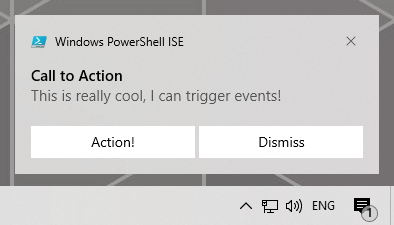
If you click that toast, either somewhere in the body of it or the “Action!” button, you see that you get a warning pop up in your PowerShell console. You’ll need to hit enter to get your prompt back.
You can now inspect the $ToastEvent variable to have a look at the data available to you inside your event script block. In particular, have a look at $ToastEvent.SourceArgs.Argument and see how that is different when you click the toast body, vs the button.
Also notice that if you click the dismiss button, nothing happens. No warning, and your $ToastEvent variable is untouched (as nothing happened to update it.) This is because the event we registered was for the “OnActivated” event. I haven’t yet found out how to register a session wide dismissed event, or if it’s even possible, so that’s an area for investigation.
This is a very simple example. If you’re interested in something a little more chunky, check out this Gist on GitHub.
A Little v1 Preview
Now, all of the above was using the raw .NET accessible via the Windows Community Toolkit dll. It’s not necessarily “easy” (especially once you start diving into the more intricate elements that can be on a toast), nor is it the “PowerShell Way.”
That’s the reason why BurntToast even exists: to make all of this stuff as easy as chucking bread into a toast and getting a delicious result.
With that in mind, I wanted to show off what that previous example may look like once BurntToast v1 is released.
Register-BTEvent -Activated -Action {
    Write-Warning "Caught an event"
    $Global:ToastEvent = $Event
}

$ContentBuilder = New-BTBuilder
$ContentBuilder | Add-BTArgument -Key 'Action' -Value 'BodyClick'
$ContentBuilder | Add-BTArgument -Key 'ToastID' -Value [guid]::NewGuid().Guid
$ContentBuilder | Add-BTText -Text 'Call to Action'
$ContentBuilder | Add-BTText -Text 'This is really cool, I can trigger events!'

$ContentBuilder | Add-BTButton -Text 'Action!' -Argument 'ButtonClick'
$ContentBuilder | Add-BTButton -Dismiss

$ContentBuilder | Show-BTToast
You’ll notice that in general that is very similar to the previous example, just more… PowerShell. Using fully formed functions means we can have guard rails via parameters, parameter sets, validation, etc. We can hide away complexity, so that the user can just focus on the toast their looking for.
Now, remember all of that console output whenever you ran an .Add* method? This mockup automatically hides that away… unless you want to chain functions together on the pipeline.
If you go this route, you’ll want to use the -PassThru parameter, or if you’re doing it en masse then you can make it the default behaviour (I’m considering making it configurable in the module’s config.json file). With that in place, the example can then be changed once again.
$PSDefaultParameterValues=@{"Add-BT*:PassThru"=$true}

New-BTBuilder |
 Add-BTArgument -Key 'Action' -Value 'BodyClick' |
 Add-BTArgument -Key 'ToastID' -Value [guid]::NewGuid().Guid |
 Add-BTText -Text 'Call to Action' |
 Add-BTText -Text 'This is really cool, I can trigger events!' |
 Add-BTButton -Text 'Action!' -Argument 'ButtonClick' |
 Add-BTButton -Dismiss |
 Show-BTToast
That, my friends, is a “one liner” toast notification!
One Main Issue Before You Go
There’s only one main issue that I’m tracking with these actionable toasts at the moment. They are so smart that they will try and launch the application that owns them when they are activated, if that application is closed at the time.
Unfortunately, most applications you’ll be using these toasts from, like PowerShell ISE, can’t handle these “launch” events.
Not cool.
We’ll figure it out eventually though!
It’s a very exciting time in the world of toast notifications. Keep an eye out on this site and on Twitter for more developments as we work towards the release of BurntToast v1.