
I’ve spent a lot of time recently working on automation solutions in Azure. These solutions use a lot of different Azure services including Logic Apps, Automation Accounts, and Functions.
When working on larger solutions, you often find that you need to use secrets and credentials. If a single solution spans multiple services, it makes sense to store these secrets once in a common place where you can always access them. This makes it so that if you need to update a secret you only have to update it once, rather than hoping you can remember all of the different places you’ve stored it.
Luckily, Azure has a service available for storing these secrets: Key Vault.
You’ll notice that this post is labeled as “Part 1”. At the time of writing I’m only planning on this “series” being two parts, but who knows what the future holds?
This part will focus on using the Az module to create a Key Vault and how to store and retrieve PSCredential objects.
Part 2 will cover seamlessly accessing secrets stored in your Key Vault as environment variables in a PowerShell based Azure Function.
Prerequisites
I’m assuming that we’re working from your local workstation here. The first couple of steps can be skipped if you happen to be using Azure Cloud Shell instead.
We’ll start by installing the Az module. This is actually a collection of many modules, of which we really only need a small handful, but it’s just easier to install all of them.
Install-Module -Name Az
With that installed, let’s get connected to our Azure tenant.
Connect-AzAccount
This will pop open a window for you to authenticate. You’ll want to login with an account that has access to your Azure subscription(s).
Creating the Vault
The first thing we need is a resource group. Think of these like a folder you keep files in on your hard drive, except these contain instances of Azure services that you setup.
If you’ve already got a suitable resource group, you can of course use it if desired. I like to keep mine self-contained, for example when I’m setting up a demo (such as for this post) I create a resource group for it. This means clean up after the demo is complete is as simple as deleting the group which also deletes all the resources it contained.
You’ll need a name for the group, and a location. I’ll be storing both in variables so that they’re easily repeatable.
$ResourceGroupName = 'rg-PsCredDemo'
$Location = 'EastUS'

New-AzResourceGroup -Name $ResourceGroupName -Location $Location
Now we need to setup our Key Vault. I’ll reuse the previous variables and add a new one, that being the name of our vault.
$VaultName = 'kv-PsCredStore'

New-AzKeyVault -Name $VaultName -ResourceGroupName $ResourceGroupName -Location $Location
Normally, you’re done. However, in my case I’m using an account that isn’t native to this Azure tenant and I got the following warning:
WARNING: Access policy is not set. No user or application have access permission to use this vault. This can happen if the vault was created by a service principal. Please use Set-AzKeyVaultAccessPolicy to set access policies.
That’s a bit of a problem, it means we don’t have rights to add secrets to our vault. You can set these permissions yourself as follows.
Note that the UPN needed here is likely not your email address and will instead be a onmicrosoft.com one. Use Get-AzADUser to find the correct UPN.
$KVAccessPolicy = @{
    UserPrincipalName         = '[email protected]'
    VaultName                 = $VaultName
    ResourceGroupName         = $ResourceGroupName
    PermissionsToCertificates = @('Get','List','Delete','Create','Import','Update','Managecontacts','Getissuers','Listissuers','Setissuers','Deleteissuers','Manageissuers','Recover','Backup','Restore','Purge')
    PermissionsToKeys         = @('Decrypt','Encrypt','UnwrapKey','WrapKey','Verify','Sign','Get','List','Update','Create','Import','Delete','Backup','Restore','Recover','Purge')
    PermissionsToSecrets      = @('Get','List','Set','Delete','Backup','Restore','Recover','Purge')

}

Set-AzKeyVaultAccessPolicy @KVAccessPolicy
This gives you full access to your vault and you’ll now be good to store your credentials in the vault.
Making a Deposit
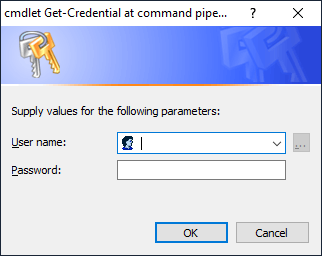
With our Key Vault setup it’s finally time to store a PSCredential object in it. To start, let’s create our local PSCredential.
$Cred = Get-Credential
Key Vault cannot accept raw PSCredential objects, so we need to convert it into a format that it understands. Credit goes to Kevin Buchs for detailing how he does this in an issue on GitHub where he was requesting native support for PSCredentials.
$SecretString = ConvertTo-SecureString -AsPlainText -Force -String ($Cred.UserName + "`v" + $Cred.GetNetworkCredential().Password)
What we’re doing here is taking the username and password from our credential, and joining them together with a “vertical tab” character (something that I would be amazed to find in a password… if that’s even possible.)
The joined pieces are then converted into a secure string which happens to be something that our Key Vault can accept.
The last thing to do, is send through our secure string as a new secret in the vault.
Set-AzKeyVaultSecret -VaultName $VaultName -Name 'TestCredential' -SecretValue $SecretString -ContentType 'PSCredential'
Give your secret a name that makes sense so that you know what it is in the future. I also like to set the content type to PSCredential so that I remember what it was specifically that I stored.
Making a Withdrawal
Storing our credential is all well and good, but it’s no good if we can’t use it later. In general, you can retrieve your secrets by calling for it by name from your specified vault.
$VaultName = 'kv-PsCredStore'

$Secret = Get-AzKeyVaultSecret -VaultName $VaultName -Name 'TestCredential'
$Secret.SecretValueText
If you follow that through, you’ll notice that the SecretValueText property is your secret in plain text. In our case that includes our password! Not great.
Rather than store my secret in a variable like that, I do the following to recreate my PSCredential object as directly as possible. This does involve retrieving my secret twice, but I prefer doing that over having to clean up other variables.
$Cred = New-Object System.Management.Automation.PSCredential (
    ((Get-AzKeyVaultSecret -VaultName $VaultName -Name 'TestCredential').SecretValueText -Split "`v")[0],
    (ConvertTo-SecureString ((Get-AzKeyVaultSecret -VaultName $VaultName -Name 'TestCredential').SecretValueText -Split "`v")[1] -AsPlainText -Force)
)
You’ll note that instead of joining with a vertical tab we’re now splitting on a vertical tab to separate our username from password. We feed both into a new PSCredential and now we’re ready to use it for our automation tasks that require them.
Wrap Up
One thing I didn’t touch on here, other than briefly in the intro, was… why? Why store your credentials in an Azure Key Vault?
For me it’s very handy to store them in a central location that can be retrieved from any number of places controlled by access policies. My on prem scripts can reach out and get them, my Azure Functions can use them too (and this will be the topic of Part 2).
It also means if I have to rotate the password then I only have to update it in one place rather than in the credential manager on my script box and in the variables of my Azure Function, etc.
Also, yes, you could potentially store your username and password as two separate secrets and get the same result… but I find this neater, especially when you start dealing with a number of secrets in your vault, to keep them as a pair in one secret.
Credit
Hero image by Emiel Maters on Unsplash