
Last weekend I wrote two plugins for PoshBot: Joker & Sentiment. Both of these were equipped with my standard Azure DevOps Pipelines treatment for testing, building, and releasing them to the PowerShell Gallery. Doing two in quick succession made me realize just how repetitive my pipelines actually are.
It was interesting timing then, that during the week I came across a post by Justin Yoo about refactoring these pipelines. This post really got me thinking about how I could do my own pipelines better, and when I shared it on Twitter, this was bolstered by being linked to Barbara Forbes’ post(s).
Justin’s post covered using templates, and Barbara’s took the next logic step of centralizing those templates in a common repository.
Feeling plenty of shame about the current state of my own Azure DevOps Pipelines, let’s see what we can do to bring them up to spec.
The Lay of the Land
Before we dive into making changes, we should have a look at what we’re starting with. The victim I’ll choose is the pipeline for PoshBot.Joker, here’s the yaml for its build job:
trigger:
  branches:
    include:
    - master
  paths:
    include:
    - /src/*

jobs:
- job: PoshBot_Joker_Test_Build
  displayName: 'Test & Build'
  pool:
    vmImage: 'windows-2019'
  steps:

  - task: PowerShell@2
    displayName: 'Run PowerShell Script Analyzer'
    inputs:
      targetType: Inline
      script: .\.pipelines\build.ps1 -Analyze -BasePath '.\src'

  - task: PowerShell@2
    displayName: 'Run Pester tests (individual .ps1 files)'
    inputs:
      targetType: Inline
      script: .\.pipelines\build.ps1 -Test -BasePath '.'

  - task: PowerShell@2
    displayName: 'Compile module'
    inputs:
      targetType: Inline
      script: .\.pipelines\build.ps1 -Compile -BasePath '.' -Module 'PoshBot.Joker'

  - task: PowerShell@2
    displayName: 'Run Pester tests (compiled .psm1)'
    inputs:
      targetType: Inline
      script: .\.pipelines\build.ps1 -Test -BasePath '.'

  - task: PublishTestResults@2
    displayName: 'Publish test results'
    inputs:
      testRunner: NUnit
      testResultsFiles: '**/TestResults.xml'
    condition: succeededOrFailed()

  - task: PublishPipelineArtifact@0
    displayName: 'Publish compiled module artifact'
    inputs:
      artifactName: 'PoshBot.Joker'
      targetPath: .\PoshBot.Joker

  - task: PublishPipelineArtifact@0
    displayName: 'Publish meta scripts'
    inputs:
      artifactName: '_Scripts'
      targetPath: .\.pipelines
The high level flow of this pipeline is:
- Run PSScriptAnalyzer against the code base, no point carrying on if the code is bad.
- Run the project’s Pester tests.
- Compile all of the functions into a single .psm1 file.
- Run the Pester tests again, just in case compilation broke something.
- Publish the test results, so that the details can be seen in the Azure DevOps interface (it is very pretty!)
- Publish two artifacts, one is the compiled module, the other is the directory which contains scripts that the release pipeline will need.
When setting up this pipeline for a new project, not much changes. In fact, the only thing that does change is the module name (hint… that’s a candidate for turning into a variable in a template!)
Create a Template
Our first step in giving these pipelines a tune up, is turning the previous yaml into a template. I’m templating the entire steps stanza:
parameters:
  VmImage: ''
  Module: ''
  JobName: ''

jobs:
- job: ${{ parameters.JobName }}
  displayName: 'Test & Build'
  pool:
    vmImage: ${{ parameters.VmImage }}
  steps:

  - task: PowerShell@2
    displayName: 'Run PowerShell Script Analyzer'
    inputs:
      targetType: Inline
      script: .\.pipelines\build.ps1 -Analyze -BasePath '.\src'

  - task: PowerShell@2
    displayName: 'Run Pester tests (individual .ps1 files)'
    inputs:
      targetType: Inline
      script: .\.pipelines\build.ps1 -Test -BasePath '.'

  - task: PowerShell@2
    displayName: 'Compile module'
    inputs:
      targetType: Inline
      script: .\.pipelines\build.ps1 -Compile -BasePath '.' -Module '${{ parameters.Module }}'

  - task: PowerShell@2
    displayName: 'Run Pester tests (compiled .psm1)'
    inputs:
      targetType: Inline
      script: .\.pipelines\build.ps1 -Test -BasePath '.'

  - task: PublishTestResults@2
    displayName: 'Publish test results'
    inputs:
      testRunner: NUnit
      testResultsFiles: '**/TestResults.xml'
    condition: succeededOrFailed()

  - task: PublishPipelineArtifact@0
    displayName: 'Publish compiled module artifact'
    inputs:
      artifactName: '${{ parameters.Module }}'
      targetPath: .\${{ parameters.Module }}

  - task: PublishPipelineArtifact@0
    displayName: 'Publish meta scripts'
    inputs:
      artifactName: '_Scripts'
      targetPath: .\.pipelines
That looks very familiar, doesn’t it?
The key differences here is that there is no longer any mention of triggers, this will be in the project’s own yaml file which calls this template. It now starts with a parameters section, where I’ve defined a couple of variables that’re usable in the template and settable when calling on the template.
I’ve elected to make the VmImage a parameter, which will allow me to reuse the template against different versions of Windows Server, or even Linux or MacOS is that makes sense for the project.
You’ll also notice that I’ve made both Module and JobName parameters. I would have considered just reusing the Module name in constructing the job name… but the job name cannot contain periods, which plugins for PoshBot generally do (e.g. PoshBot.Joker). I could have just made the job name static, but I like to make them more specific than that.
You can use these variable within the template using this syntax: ${{ parameters.ParameterName }}, just swap out the Parameter name for the specific one you’re wanting to reference.
A Central Location
I’m going to skip a key part here, testing that my template actually works, and jump straight to putting it in its own repository on GitHub. After reading through the blog posts I linked above I’m (perhaps over-) confident that this template will just work.
Going forward my templates will all be located in a “CentralPipeline” repository on GitHub, and the template we’re using here can already be found there.
Note that in order to use this location on GitHub, you need to have an authorized service connection. These get automatically created when you setup GitHub repositories as the sources for your code in a given Azure DevOps pipeline, but I like to create a generic “github” one for use in all projects, regardless of which account or organization owns the code being built.
In any project, head to the project settings, then service connections and add a new GitHub connection. I name mine ‘github’ and then click authorize.
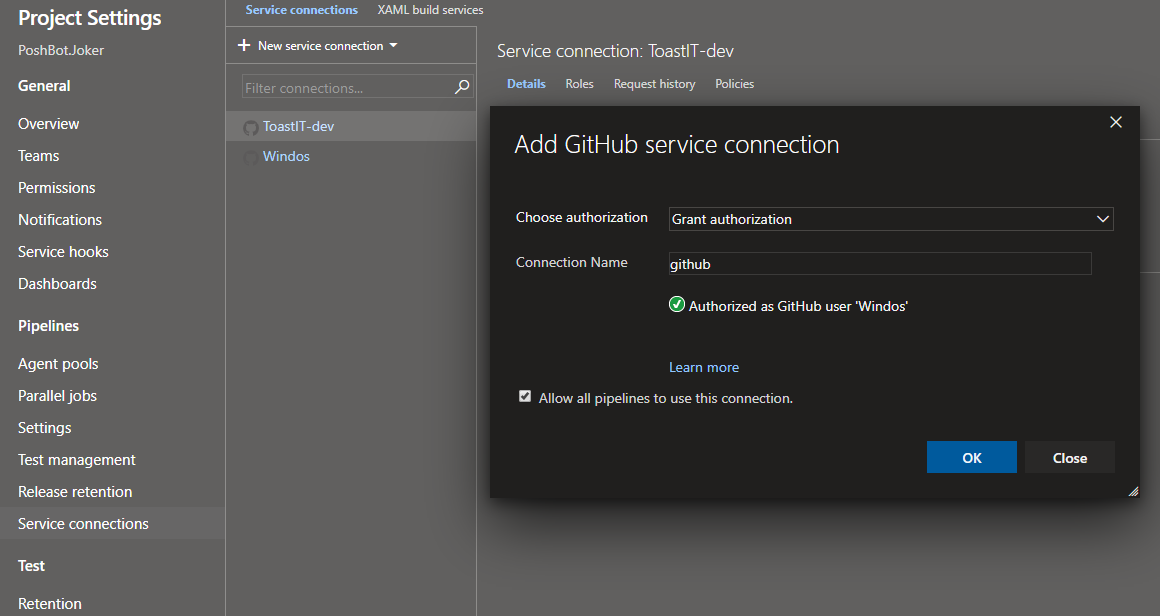
Creating a new GitHub service connection
You’ll see on the left hand side two of this screenshot that I have two existing connections which I could have used. I’ll point out in the following section where this specific connection is being used.
Applying the Template
Finally, we’ll circle back to the original project and adjust its yaml to replace the unneeded parts are start using our new template.
We leave in the trigger section which indicates when the pipeline should run (in this case it runs when any changes are made to the source code (in the ‘src’ directory) on the master branch. This means anything changed that isn’t “code” such as the repository’s readme file or work on a dev branch won’t trigger a new build.
trigger:
  branches:
    include:
    - master
  paths:
    include:
    - /src/*
Next we setup a resource for the location of our template, this is that CentralPipeline repository I created for my own templates. Note the endpoint line, which is set to ‘github’ which indicates which service connection to use. This is where I could have used one of the other connections that had been automatically created but I like the look of using a generic one.
resources:
  repositories:
    - repository: CentralPipeline
      type: github
      endpoint: github
      name: ToastIT-dev/CentralPipeline
The repository is what you’ll reference this repo as, it doesn’t need to match the actual repo name, and the name is the location on GitHub in the format of Owner/Repo Name. As you can see, my template repo is owned by the “ToastIT-dev” organization.
Finally, let’s use the template and provide the parameters needed to customize it.
jobs:
- template: standard-build-template.yaml@CentralPipeline
  parameters:
    VmImage: windows-2019
    Module: PoshBot.Joker
    JobName: PoshBot_Joker_Test_Build
Remember that we templated the entire jobs stanza, so inside that stanza in our “real” yaml we reference the template in the form of filename/path@repository name remembering that this name is the name provided under the resources section that doesn’t need to actually match the name on GitHub.
Head over to GitHub to see the entire yaml file… it’s a lot smaller than when we started.
It’s Alive!
All going well, the next time the pipeline runs we’ll have a successful build:
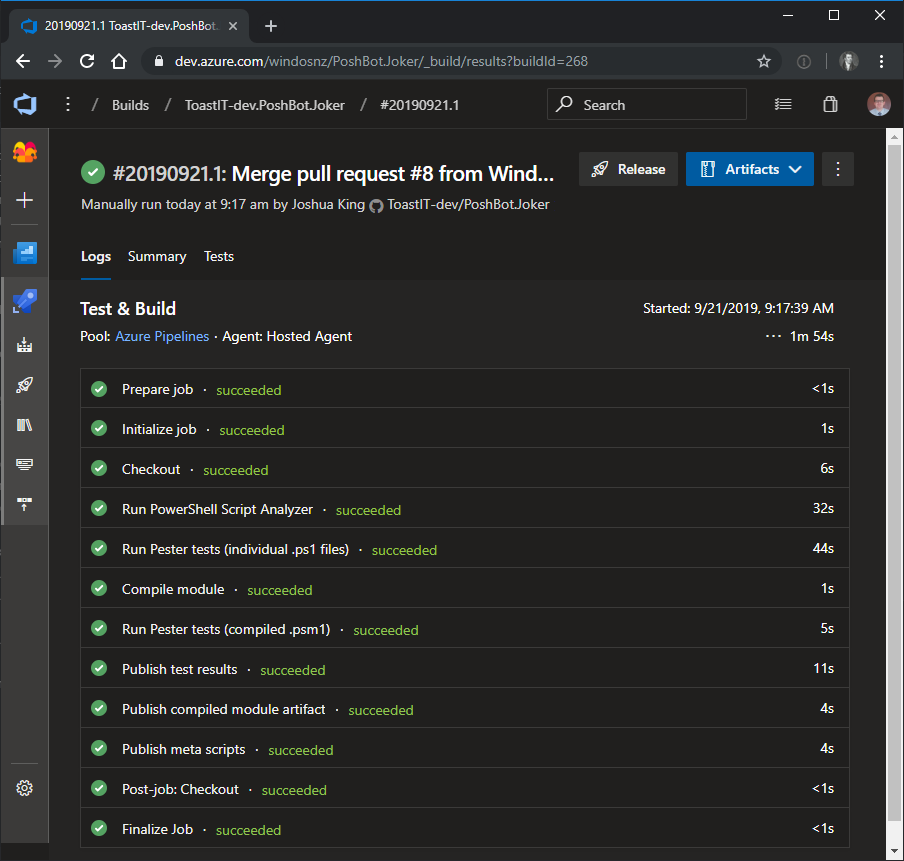
Funnily enough, this looks no different from when I started. That’s a good thing, we’ve simplified setting these pipelines up and the end result is exactly the build pipeline I need.
Going forward if I wanted to add more standard steps to the build, I just need to edit the one template rather than going through every single project and updating their snowflake yaml files.
It also means there’s less chance of me messing up something when editing the master yaml file when setting up a new project (which has happened many more times than I’d like to admit.)
Final Words
Thanks again to both Justin and Barbara for getting me started on this journey of making my pipelines more efficient. There’s more work for me to do on this front, first of which is to move all of my other projects over to this new template.