
Despite the name of this series of posts, the first one didn’t contain too many fails. Credit where credit is due, that’s because of Tyler’s ground work on the build pipeline front. When it came to release pipelines I was flying blind, bring on the fails!
If You Don’t Clean Your Room, You Won’t Get Any YAML
Unlike the build pipelines we’ve just finished with, there is (currently) no support to configure release pipelines via YAML. This means we’ll be using the visual editor.
Defaults on New Pipelines
When you go in to create a new pipeline, you’ll be presented with a smorgasbord of templates to start with. These cover a huge range of scenarios, including deploying a Node.js app to Azure App Service and deploying a Kubernetes Cluster.
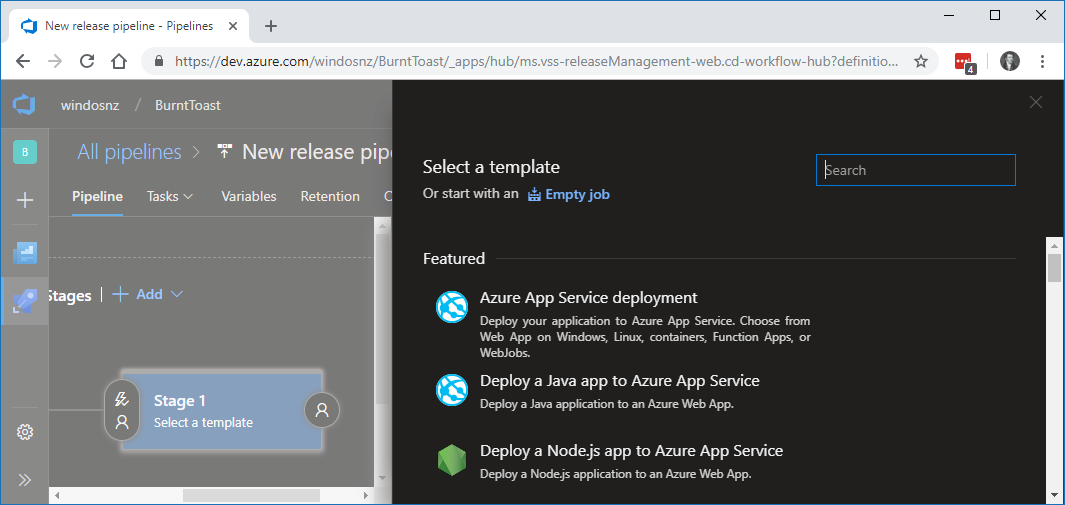
If one of these are close to what you’re looking to do, go ahead and use them. For me though, I started with an empty job.
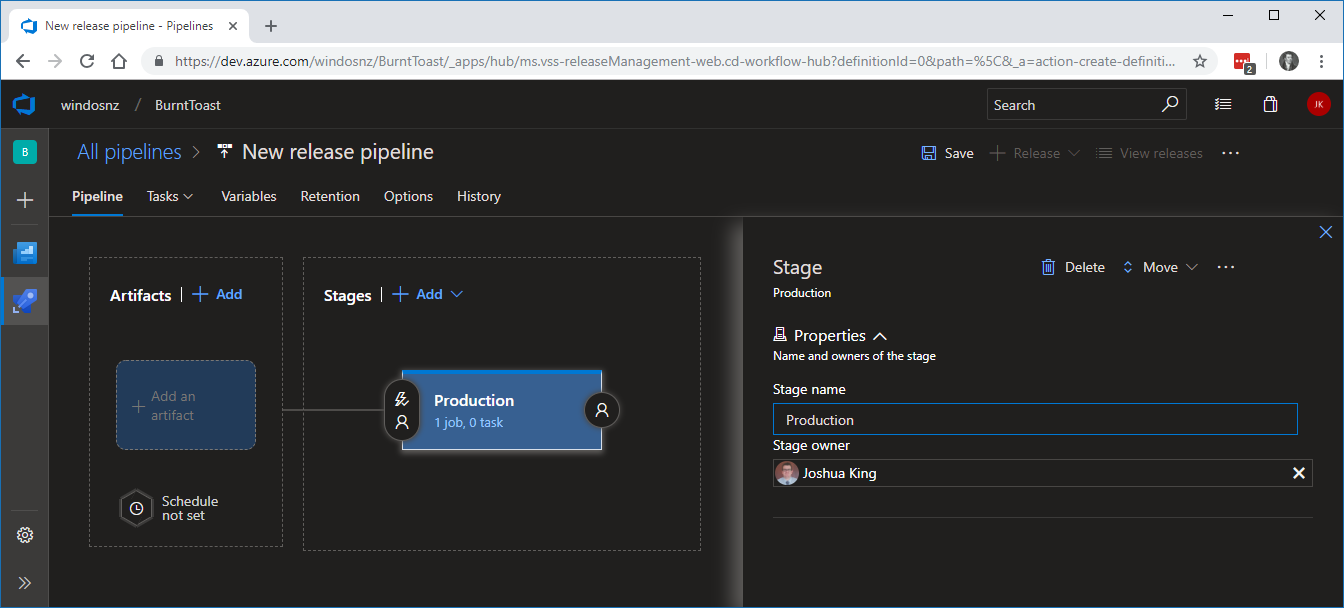
You’ll then be prompted to name your first stage. Depending on your requirements you may need to deploy to multiple stages, like “Test”, “UAT”, and “Prod”.
For a PowerShell module though, and especially on my first run through, I just went straight to production (and why wouldn’t you deploy to production?)
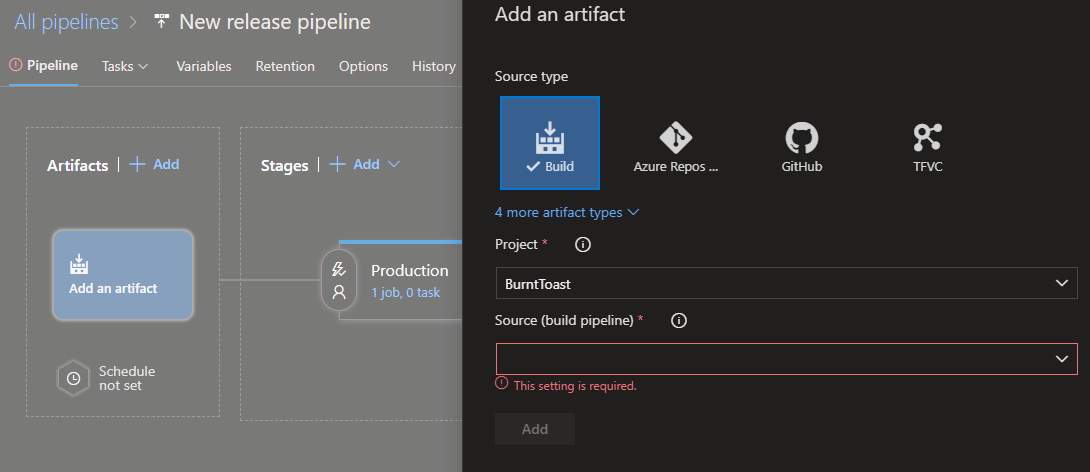
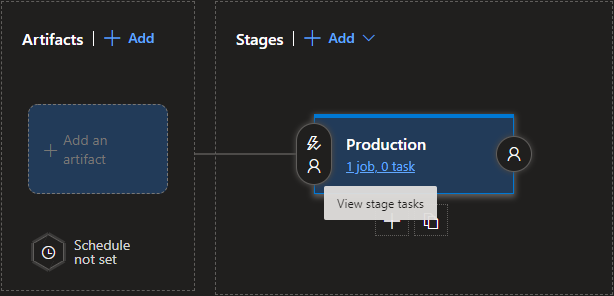
Next, add an artifact. This is effectively letting your release pipeline know where to pull the “bits” from that it’s going to release. This can come directly from your source control, such as GitHub or Azure Repos, but since we’ve got a build pipeline setup, we’ll stick with that.
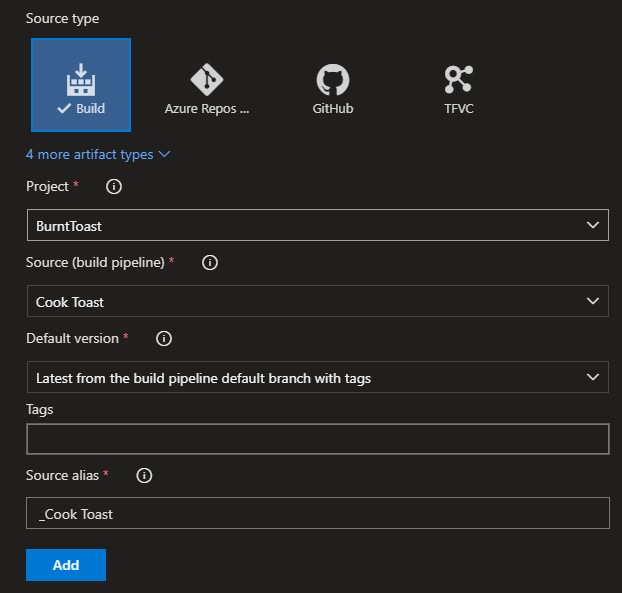
If you’re leaving your source as a build pipeline, go ahead and select the project, the specific pipeline and the default version. You can specify this at runtime manually, but I like to set it to the latest from the build pipeline.
Also, don’t forget to name and save your pipeline. It’s currently called “New release pipeline” and you can change this by clicking the name at the top of the screen. Changing the name will force you to save the pipeline… if you don’t do this and you close the page without thinking about it… all your work’s gone!
On this screen you can also enable triggers to make deployment to your stages automatic. We’ll discuss later that I manually create releases, but I do want to automatically deploy to the production stage when a release is created. To do this, click the pre-deployment conditions button next to the stage.
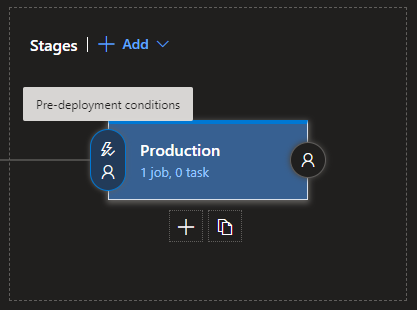
As you’ll see, the default here is to automatically deploy “after release” which is perfect for me. If you want to ensure that you have some input, you can toggle this to manual only. There’s a lot of other options you can play with, that I haven’t touched yet, including specify who needs to give their approval before a deployment can proceed.

Before we start diving into making our pipeline do something, let’s have a look at the lay of the land around jobs and tasks. It’s not the most intuitive thing in the world, but to start adjusting these, click the link under the stage’s name.
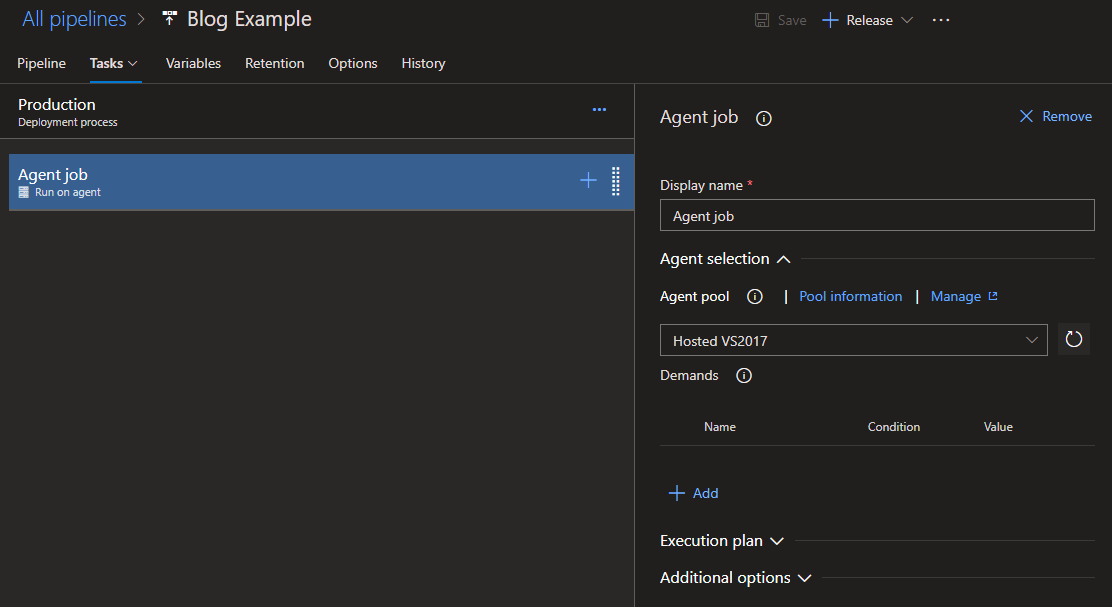
With no jobs configured, you end up on a somewhat sparse screen and the first time I landed here I was a little confused about what’s next.
On the left you’ll see you default job. Remember from our dive into build pipelines that jobs contain tasks, and a pipeline can have one or more jobs. If you click on the job, you can edit its settings, like name and which agent pool it uses (mainly, selecting if it runs on Windows or Linux.)
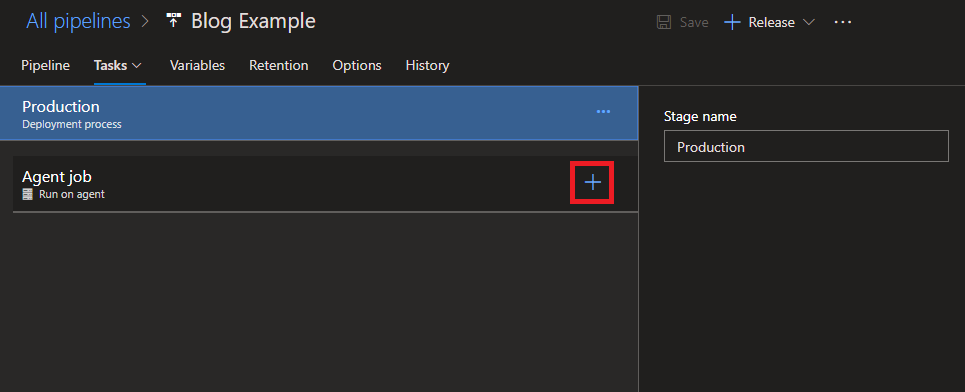
What about adding tasks? Hit the “+” next to the name of your job. You’ll be greeted by a (searchable) list of available tasks, select one to add them then click on an added task on the left to configure them.
My Pipeline
Up until now I’ve been showing you a new/default release pipeline, but I think it’s about time I jump over to my “real” one for BurntToast.
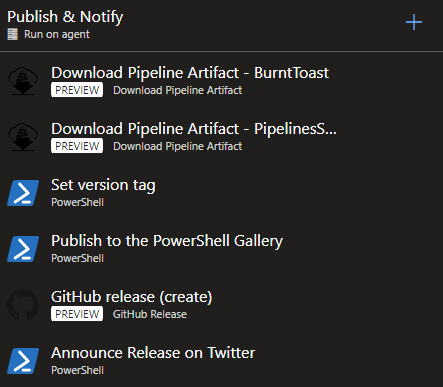
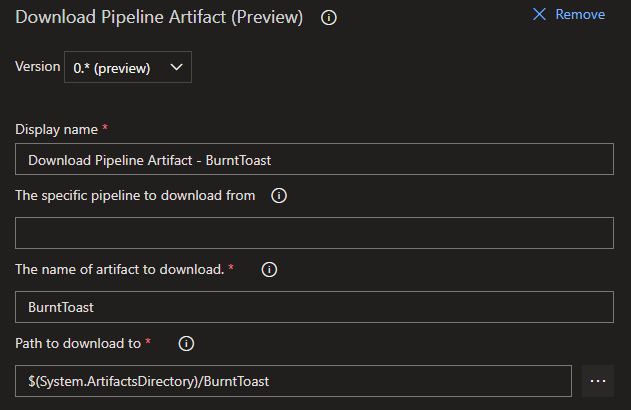
The first thing you’ll notice is two “Download Pipeline Artifact” tasks. These are matched to two “Publish Pipeline Artifact” tasks in my build pipelines. You can specify a specific pipeline from which to download artifacts, otherwise it’ll download from the default for this pipeline.
The only other things to configure here are the name of the artifacts, matching what you specified in the publish task previously, and the path to download to.
Next we’ll add various PowerShell tasks (we’ll look at the code soon.) They are very similar to their build pipeline counterparts, just configured through the visual interface rather than YAML.
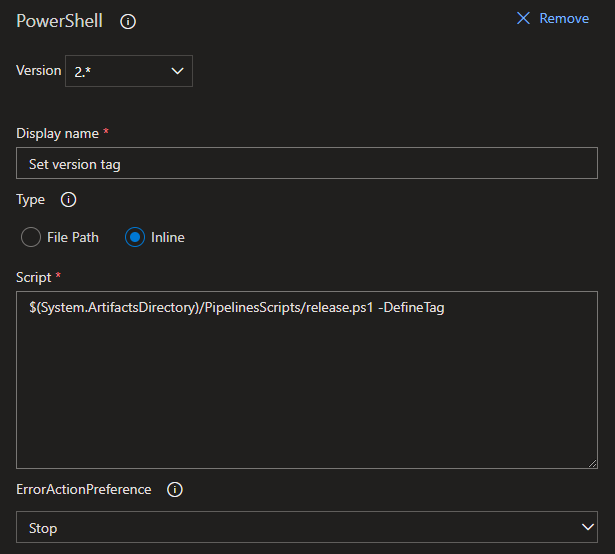
Notice that the path to my script uses the same automatic variable provided by Azure Pipelines as my Pipeline Artifact Download. That “PipelinesScripts” path was specified during the download as well.
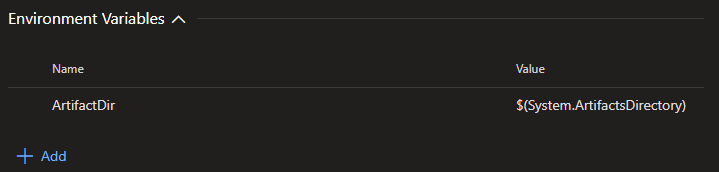
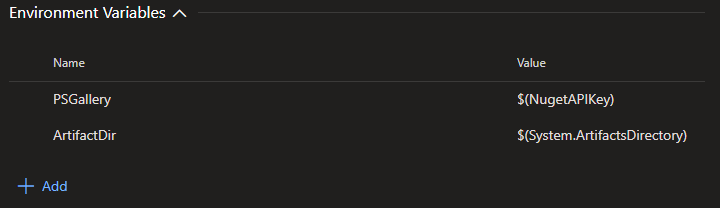
Each of my PowerShell tasks have some environment variables configured.
The version tag task has a variable for the artifacts directory.
The PowerShell Gallery publishing task also has the artifacts directory but also has our API key.
And the Twitter announcement task has a lot! Once again we’ve got the artifacts directory, but we’ve also got our four Twitter keys, and a “release message” which we’ll talk a little more about later.
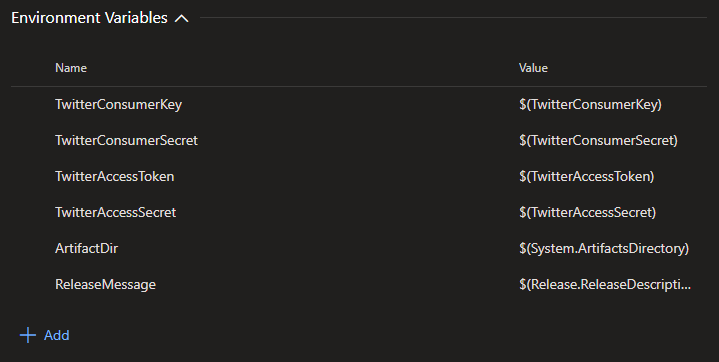
These environment variables are used within our scripts like any other environment variable. For instance, the artifacts directory one that all of our tasks have would be referenced as $env:ArtifactDir
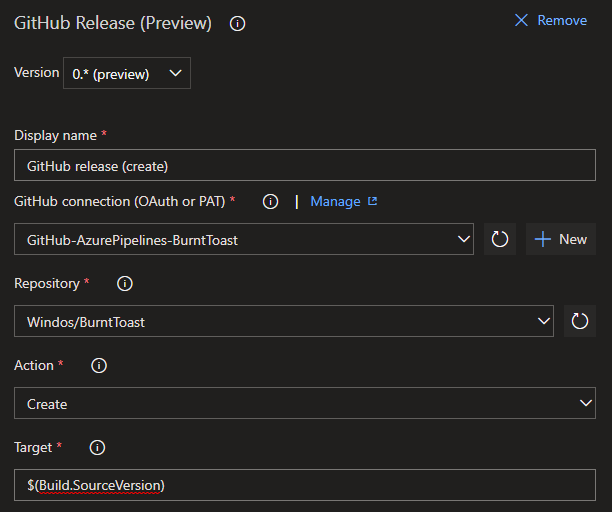
The final task here is the “GitHub release (create)” one. This is a really nice way of getting a release up on the GitHub repo for your project. If you haven’t already done so, you’ll need to setup OAuth to allow this action to be carried out by Azure Pipelines. Once the connection is sorted, choose the repository and “target” (the SHA of the commit on GitHub which forms this release… luckily this is stored in a variable automatically: $(Build.SourceVersion))
You also need to specify a tag and release title. These are using variables, which are set via one of the PowerShell tasks and we’ll look at the code for that soon (I promise.)
Our build pipeline also saved a zip file of the release, and a text file containing the release notes. These were within one of the artifacts and we’ll use them here to flesh out our GitHub release. I’ve also opted into adding a changelog, which lists out all of the commits since the last release.

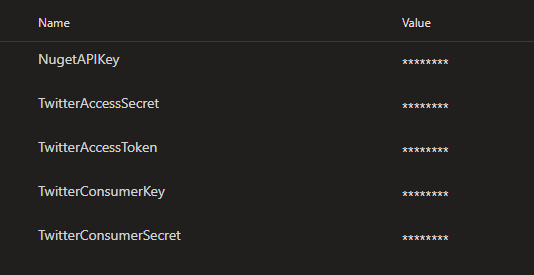
Before we get to the code, let’s quickly look at the custom pipeline variables we’ll be using since it’s right here. To manage your variables, click the tab for it below the name of your pipeline.
You’ll need five variables defined (and made secret, so one can’t see the plain text behind them.) One is an API key for the PowerShell Gallery, with permission to publish new releases for the specific project that this pipeline will release. The other four are all Twitter… don’t ask me why you need four keys for Twitter, but the setup for your Twitter module of choice will point you in the right direction.
Release Scripts… Totally Different Than Build Scripts
You can see the complete script over on GitHub, if you’re wanting to jump straight to the end.
We’ll start with the switches which control which blocks of code are run by a given task, and the bootstrap step. If you skipped the previous post in this series, the bootstrap strep is where I check for, and install, modules I’m relying on for my script to run.
[CmdletBinding()]
param(
    [switch]
    $Bootstrap,

    [switch]
    $DefineTag,

    [switch]
    $Publish,

    [switch]
    $Announce
)

# Bootstrap step
if ($Bootstrap.IsPresent) {
    Write-Information "Validate and install missing prerequisits for building ..."

    # For tweeting
    if (-not (Get-Module -Name PSTwitterAPI -ListAvailable)) {
        Write-Warning "Module 'PSTwitterAPI' is missing. Installing 'PSTwitterAPI' ..."
        Install-Module -Name PSTwitterAPI -Scope CurrentUser -Force
    }
}
The only module I need to install here is PSTwitterAPI, which is the module I’ve decided to use for getting a tweet out about my new release.
My first “real” PowerShell task defines the version number for the release. This was stored in a text file during the build and then this is opened and assigned to a pipeline variable.
# Define Tag step
if ($DefineTag.IsPresent) {
    $ReleaseVersion = Get-Content -Path $env:ArtifactDirPipelinesScriptsrelease-version.txt
    Write-Host "##vso[task.setvariable variable=RELEASETAG]$ReleaseVersion"
}
That variable, now that it is set, can be used in any other task within this particular job, but won’t be available in other jobs if you happen to have more than one. Where you saw $(RELEASETAG) previously, that was me referencing this variable.
Next, we’ll actually publish this module to the PowerShell Gallery.
# Publish step
if ($Publish.IsPresent) {
    # Publish Module to PowerShell Gallery
    Try {
        $Splat = @{
            Path        = (Resolve-Path -Path $env:ArtifactDirBurntToast)
            NuGetApiKey = $env:PSGallery
            ErrorAction = 'Stop'
        }
        Publish-Module @Splat

        Write-Output -InputObject ('BurntToast PowerShell Module published to the PowerShell Gallery')
    } Catch {
        throw $_
    }
}
This pulls in the API key variable for the Gallery, via the environment variable set on the task. It then just references the path to our module in the Artifact Directory (again, via an environment variable) and the call the publish module cmdlet to do the deed.
Once this executes, our updated module will be live on the Gallery. I… may have tested this a few times myself.

The final task is in aid of letting the world know that a new release is out in the wild. We do that via Twitter, and since this is the only task that needs the Twitter module, I only call the bootstrap section at this stage.
I start by checking for the module, throwing an error if it’s not installed or importing it if it is installed.
if($Announce.IsPresent) {
    if (-not (Get-Module -Name PSTwitterAPI -ListAvailable)) {
        throw "Cannot find the 'PSTwitterAPI' module. Please specify '-Bootstrap' to install release dependencies."
    }

    Import-Module -Name PSTwitterAPI
Next, let’s use our four Twitter keys to build up a hash table and set out OAuth settings.
    $OAuthSettings = @{
        ApiKey            = $env:TwitterConsumerKey
        ApiSecret         = $env:TwitterConsumerSecret
        AccessToken       = $env:TwitterAccessToken
        AccessTokenSecret = $env:TwitterAccessSecret
    }

    Set-TwitterOAuthSettings @OAuthSettings
Then, pull the release version from the text file (I found this easier than referencing the variable that was set in an earlier task…) and the string representation of our tweets.
    $ReleaseVersion = Get-Content -Path $env:ArtifactDirPipelinesScriptsrelease-version.txt

    $Tweets = @("I just pushed BurntToast v$ReleaseVersion to the #PowerShell Gallery via @AzureDevOps!$([System.Environment]::NewLine)$([System.Environment]::NewLine)$env:ReleaseMessage$([System.Environment]::NewLine)$([System.Environment]::NewLine)https://www.powershellgallery.com/packages/BurntToast/$ReleaseVersion",
                "You can also find this release over on @GitHub.$([System.Environment]::NewLine)$([System.Environment]::NewLine)Please do fire through any issue, feature requests, or submit some additional code!$([System.Environment]::NewLine)$([System.Environment]::NewLine)https://github.com/Windos/BurntToast/releases/tag/v$ReleaseVersion")
Wait, Tweets?
Yeap, that’s an array containing two (long) strings which will end up forming two tweets. The first announces the release, and links to it on the PowerShell Gallery. The second reminds people that it can also be found on GitHub and to open issues as needed.
I can easily add a third tweet here, and I’m considering including the release notes… but I don’t believe there’s much value in that.
You’ll have to have been very keen eyed, but in the first tweet I’m referencing the $env:ReleaseMessage variable that we passed through to the task. This is defined when we create a release and allows me to personalize the message going out, along the lines of “This release does x, and make sure you try y!”
Finally, we send the tweets. We do this by looping through all of our tweet strings. If we’ve already sent a tweet, we reply to that, so we end up creating a tweet chain.
    foreach ($Tweet in $Tweets) {
        if ($PrevTweet) {
            $PrevTweet = Send-TwitterStatuses_Update -in_reply_to_status_id $PrevTweet.id.ToString() -status $Tweet
        } else {
            $PrevTweet = Send-TwitterStatuses_Update -status $Tweet
        }
    }
}
And believe it or not… we’re done!
Well, sort of. We’ve got to create a release now.
Release the Kraken!
There’s a few options for automatically creating new releases, but given that mine ends up out on the Gallery and Twitter I didn’t really want to risk that going AWOL. So I only create new releases manually. There’s two main options for manually creating a release.
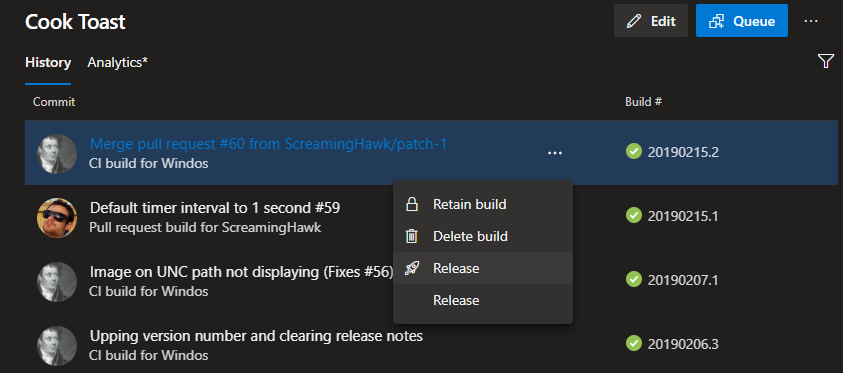
The first is from a successful build. If I look at the history on my build pipeline, I can choose a build and select it for release.
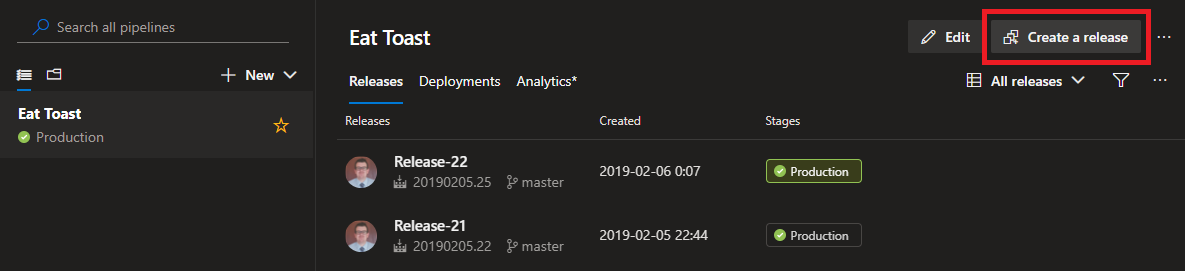
The other options is by pressing the “Create a release” button when looking at your history of releases.
Regardless, you’ll end up with the “Create a new release” blade to fill out. You’ll need to choose an artifact, if you chose the first method this will be pre-selected and otherwise it’ll be set to the latest.
You can also fill out the release description, and I certainly do as the text I enter here ends up in my tweet.
The top of the blade is a little misleading unless you stop to actually read the text. Selecting something up here overrides any automation you have on your stages and sets them to manual.
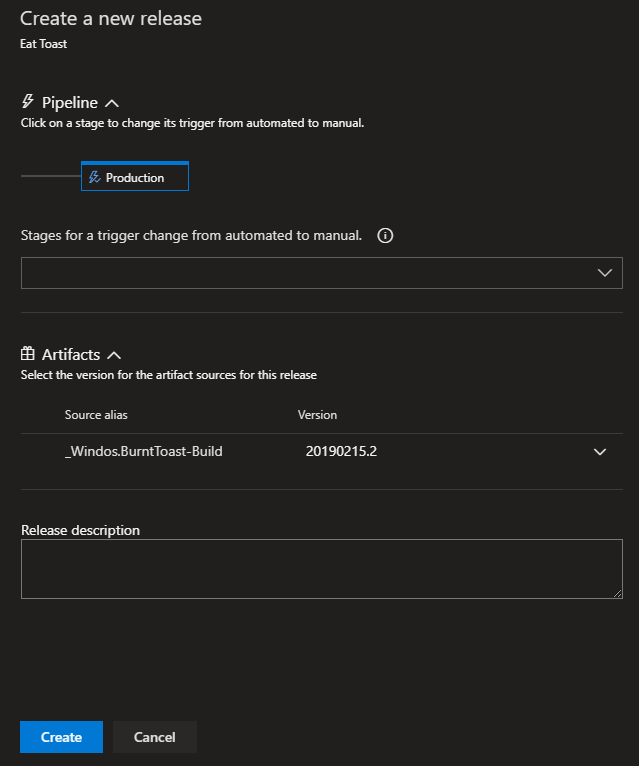
If you remember the default conditions on our production stage… if we don’t provide an override here, creating this release will go straight into running our deployment tasks.
And now we’re done!
I Need Proof of Life
The best way to convey this whole process, from GitHub commit to Gallery release, is to see it. I’ve gone through this process and recorded it so you can see it all happen.
Is This the End?
I mentioned at the end of the previous post in this series that I wasn’t sure if it was going to be a two or three parter. This post, like the previous one, is roughly the 3,000 words long and is beginning to feel unwieldy.
There will be a third post to round out this series, covering some refinements I’ve made to these pipelines and a summary of what I’ve learned on this journey.
In the meantime, keep an eye on Twitter for potential release notification and also let me know if and how you’re using Azure Pipelines.