When something new and shiny comes out, I find myself needing it to “click” with me before I go “right, yes, I need to use that.”
This isn’t to say I don’t see the value in it. I just assume that it’s for someone other than me.
Azure Pipelines, part of Microsoft’s DevOps Services, was in that box for a long time. I assumed it was way out of my league, that it could work for PowerShell projects but ones that are much bigger than what I work on.
The Click Moment
I remember the exact moment that Azure Pipelines clicked for me. Tyler Leonhardt, Stephen Valdinger, and I were working on PoshNotify and Tyler submitted a PR with the guts of a build pipeline and asked me to hook it up within Azure Pipelines.
The first time I was a build run, I was sold.
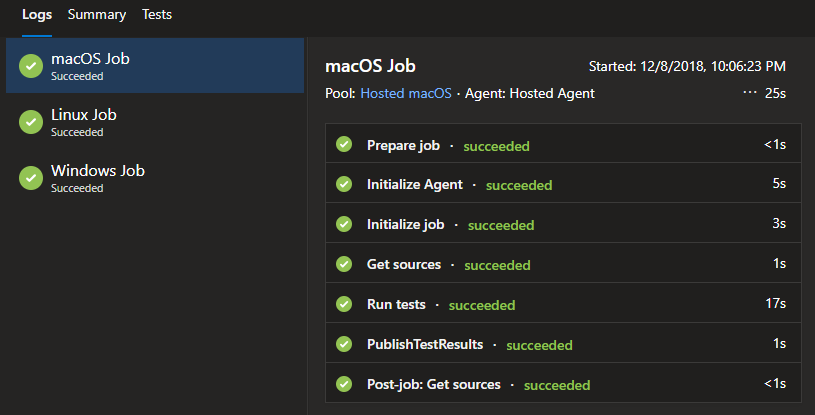
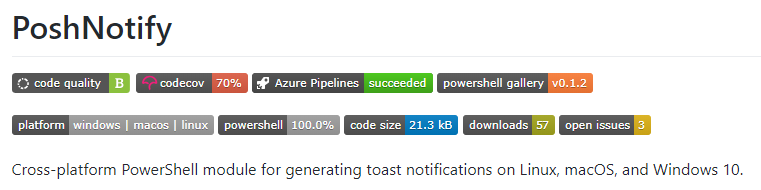
PoshNotify is a cross-platform PowerShell module, and what Tyler had setup was a build that ran our suite of Pester tests against all of our major targets: macOS, Linux, and Windows.
We wanted needed badges on our GitHub readme, and that meant sorting out things like code coverage stats. After that, publishing to the PowerShell Gallery was the next logical step, right?
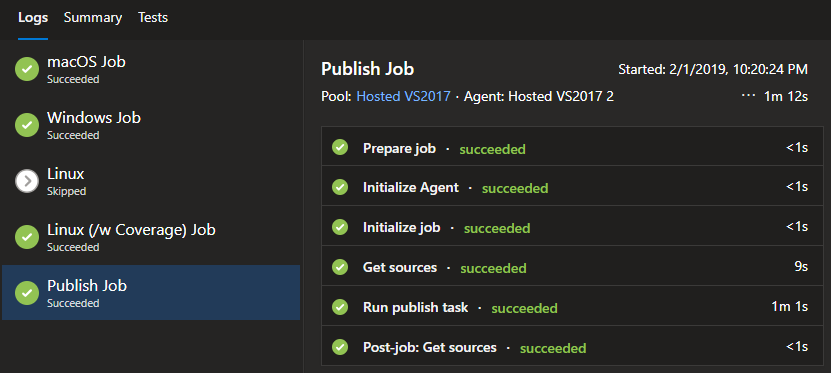
From there, I ran with it a little bit. I still hadn’t quite figured everything out and just put everything, including the Gallery release, into our build pipeline rather than branching out to a release pipeline.
Still, for a first attempt, I’m really happy that I got it going.
That was my “click” moment, which got me hooked on Azure Pipelines. But this specific project isn’t the topic of this post… instead let’s have a look at my second attempt at setting this up for a PowerShell project: BurntToast.
Laying the Groundwork
Since the basis of my build pipeline is ensuring that nothing is broken, I needed to expand (or rather create) my suite of Pester tests. When I looked into it, it turned out that the only tests I had previously written for BurntToast were for a function that no longer existed. Oops.
Effectively, I was starting from nothing, which meant I needed to take a step back and think about how I was going to go about actually testing all this stuff. Like… how do I test that a toast displayed?
Once again, I took inspiration from Tyler. Over on PoshNotify we were testing the output when you supply the WhatIf flag. For the actual toasts, this meant being able to check that the XML generated matched what I expect it to be. It also allowed me to test the complex objects being created by the bulk of the other functions too.
It turns out, though, that I didn’t have WhatIf wired up. My first task was to go through each of my functions and set up ShouldProcess. Check out an example of how this was done at the end of Submit-BTNotification.
This “What If” work sorted, I manually pushed a release of BurntToast to the Gallery. In theory this would be the last time I edit the user facing code while going on my Pipelines journey.
The final piece of ground work was writing the test cases. If you’re curious about how to test What If output, go have a look, it’s basically a case of starting a transcript, running your test, and pulling the What If message from the transcript. Check that it’s what you’re expecting, and you’re done!
Building Your Build Pipeline
After a very long introduction, it’s finally time to start getting into the meat of Azure Pipelines. There is a graphical editor for this, and we’ll see this later when we move on to release pipelines (because it’s the only option), but we’re going to be doing this in straight YAML.
By default your YAML file will be called azure-pipelines.yml and be stored in the root of your repo. But you don’t have to stick to that convention. I made the decision to have a directory called Azure-Pipelines where I store all of the related configuration files and scripts.
If you want to jump forward and see “the goods” check out build.yml and build.ps1
We’re about to go through a lot of code, both PowerShell and YAML. I’ll do my best to tackle this in manageable chunks and will highlight areas of peak failure as we go.
Metadata (Bonus Points for Puns)
First, some configuration for the entire build pipeline.
jobs:
- job: CookToast
  displayName: 'Cook Toast'
  pool:
    vmImage: 'VS2017-Win2016'
  steps:
These pipelines are divided into Jobs, Steps, and Tasks. PoshNotify has multiple jobs, one for each operating system, but on BurntToast I only needed one. I named the job ‘CookToast’, and this name can’t have a space in it… hence the display name specified just under it.
The only other interesting thing here the vmImage line, which let’s Azure know which pool we want to run our tasks on. I haven’t actually found a list of available images (as the one’s Tyler used gave me what I needed), but this 2016 one has been a workhorse for me.
Getting Our (First) Test On
Next, we’ll run our first task.
  - task: PowerShell@2
    displayName: 'Run tests (individual .ps1 files)'
    inputs:
      targetType: Inline
      script: ./Azure-Pipelines/build.ps1 -Bootstrap -Test
This is where we can start flexing our PowerShell muscles. The task is a pre-defined block provided by Microsoft for run PowerShell code. The @2 indicated that we’re using the second version.
If you don’t provide a display name, you’ll end up with the generic name… which gets very confusing if you’ve got more than one of these.
As you may have guessed from the display name, and the switches against the script, this task runs our tests, but what code is it running? And what’s with the bootstrap switch?
[CmdletBinding()]
param(
    [switch]
    $Bootstrap,

    [switch]
    $Compile,

    [switch]
    $Test
)

# Bootstrap step
if ($Bootstrap.IsPresent) {
    Write-Information "Validate and install missing prerequisits for building ..."

    # For testing Pester
    if (-not (Get-Module -Name Pester -ListAvailable)) {
        Write-Warning "Module 'Pester' is missing. Installing 'Pester' ..."
        Install-Module -Name Pester -Scope CurrentUser -Force
    }

    if (-not (Get-Module -Name PSCodeCovIo -ListAvailable)) {
        Write-Warning "Module 'PSCodeCovIo' is missing. Installing 'PSCodeCovIo' ..."
        Install-Module -Name PSCodeCovIo -Scope CurrentUser -Force
    }
}

# Test step
if($Test.IsPresent) {
    if (-not (Get-Module -Name Pester -ListAvailable)) {
        throw "Cannot find the 'Pester' module. Please specify '-Bootstrap' to install build dependencies."
    }

    if (-not (Get-Module -Name PSCodeCovIo -ListAvailable)) {
        throw "Cannot find the 'PSCodeCovIo' module. Please specify '-Bootstrap' to install build dependencies."
    }

    $RelevantFiles = (Get-ChildItem ./BurntToast -Recurse -Include "*.psm1","*.ps1").FullName

    if ($env:TF_BUILD) {
        $res = Invoke-Pester "./Tests" -OutputFormat NUnitXml -OutputFile TestResults.xml -CodeCoverage $RelevantFiles -PassThru
        if ($res.FailedCount -gt 0) { throw "$($res.FailedCount) tests failed." }
    } else {
        $res = Invoke-Pester "./Tests" -CodeCoverage $RelevantFiles -PassThru
    }

    Export-CodeCovIoJson -CodeCoverage $res.CodeCoverage -RepoRoot $pwd -Path coverage.json

    Invoke-WebRequest -Uri 'https://codecov.io/bash' -OutFile codecov.sh
}
The top of our PowerShell script has a bunch of switches, this lets us control which parts of the code is run by a given task.
This first task includes a bootstrap option which checks for any required dependencies and installs them if needed. We obviously need Pester to run our tests, but what is PSCodeCovIo? We’ll see a little more of this in a moment, but in short it transforms code coverage stats from Pester into a format that Codecov can work with.
As for the tests themselves we start by once again checking for our dependencies (just in case the bootstrap hasn’t been run yet), then we build a list of “relevant files.”
This is part of the code coverage feature built into Pester. Pester needs to know which files actually make up the contents of your module, and it uses this to figure out which files (and lines within files) weren’t touched while running your tests.
When we actually run our tests, we assign the output (which includes the code coverage info) to the variable $res, and for environments like Azure Pipelines we also tell it to use the NUnitXml format for it’s output so that it can be read properly.
At the end of our test section, we pass the $res variable though Export-CodeCovIoJson from the PSCodeCovIo module. This outputs a JSON file. We then also call an address on the internet to download a Bash script.
And… that’s it? We’re not doing anything with the JSON file or script?
Not yet… first we’re going to compile our module.
Compile? You Think I’m Some Sort of Developer?!
  - task: PowerShell@2
    displayName: 'Compile module'
    inputs:
      targetType: Inline
      script: ./Azure-Pipelines/build.ps1 -Compile
As you can see, we’re calling our build.ps1 script again, with the Compile switch.
# Compile step
if ($Compile.IsPresent) {
    if (Get-Module BurntToast) {
        Remove-Module BurntToast -Force
    }

    if ((Test-Path ./Output)) {
        Remove-Item -Path ./Output -Recurse -Force
    }

    # Copy non-script files to output folder
    if (-not (Test-Path .Output)) {
        $null = New-Item -Path .Output -ItemType Directory
    }

    Copy-Item -Path '.BurntToast*' -Filter '*.*' -Exclude '*.ps1', '*.psm1' -Recurse -Destination .Output -Force
    Remove-Item -Path .OutputPrivate, .OutputPublic -Recurse -Force

    # Copy Module README file
    Copy-Item -Path '.README.md' -Destination .Output -Force

    Get-ChildItem -Path ".BurntToastPrivate*.ps1" -Recurse | Get-Content | Add-Content .OutputBurntToast.psm1

    $Public  = @( Get-ChildItem -Path ".BurntToastPublic*.ps1" -ErrorAction SilentlyContinue )

    $Public | Get-Content | Add-Content .OutputBurntToast.psm1

    "`$PublicFunctions = '$($Public.BaseName -join "', '")'" | Add-Content .OutputBurntToast.psm1

    Get-Content -Path .Azure-PipelinesBurntToast-Template.psm1 | Add-Content .OutputBurntToast.psm1

    Remove-Item -Path .BurntToast -Recurse -Force
    Rename-Item -Path .Output -NewName 'BurntToast'

    # Compress output, for GitHub release
    Compress-Archive -Path .BurntToast* -DestinationPath .Azure-PipelinesBurntToast.zip

    # Re-import module, extract release notes and version
    Import-Module ./BurntToast/BurntToast.psd1 -Force
    (Get-Module BurntToast)[0].ReleaseNotes | Add-Content .Azure-Pipelinesrelease-notes.txt
    (Get-Module BurntToast)[0].Version.ToString() | Add-Content .Azure-Pipelinesrelease-version.txt
}
Umm, compile?
When working on my module, all of the functions are in their own .ps1 file. But when I push out a release, I want all of those functions to be included in the module’s .psm1 file. There’s a few benefits around doing this, but the main one as far as users are concerned is the speed of importing the module. For BurntToast this more than halved the time it took to import on my machine.
Thanks to Chris Gardner for giving a lot of press to this topic, which made me think to do it.
Given we’re PowerShell people, and automation is our game, there’s no way we want to be copying these functions into the .psm1 file manually, right? That’s the impetus for this compile step.
This task starts with removing BurntToast from the current session. We’re about to be deleting things, and BurntToast imports a dll which would make this near impossible if not released.
Next, we create an “Output” directory (or clear it out if it already exists) then copy all of the contents of our module except .ps1 files and the .psm1.
Now we start building up a new .psm1 file, starting by dumping the contents of any private functions into it. We follow this up with the public function, although we also store these in a variable as we need to list their names as an array of strings. That’s what this little snippet is all about, notice we’re putting quote marks around each name, that’s to ensure each name is treated as a string.
"`$PublicFunctions = '$($Public.BaseName -join "', '")'" | Add-Content .OutputBurntToast.psm1
Finally we dump in a template of the rest of our .psm1 file. This is static content (unlike the stuff above it), and it references the $PublicFunctions variable as the list of functions to export.
Now we delete the folder containing our regular BurntToast directory, which contains the version of the module with individual .ps1 files. Our Output directory is renamed to BurntToast, meaning that this compiled version of the module is now “live”.
Finally we get some artifacts ready for a potential release (even if a release doesn’t eventuate from this build.)
This includes a zip archive of the BurntToast directory, to be included as a binary on any GitHub releases.
We also need some info from the module, so the module is re-imported, and the Release Notes and Version number extracted and saved to their own .txt files.
How do we know that we’ve compiled our module, how do we know this hasn’t broken anything? We run the tests again!
  - task: PowerShell@2
    displayName: 'Run tests (compiled .psm1)'
    inputs:
      targetType: Inline
      script: ./Azure-Pipelines/build.ps1 -Test
You’ll note that this task is very similar to the last time we ran our tests, just with a different display name and without the bootstrap switch (you only need to do that once.)
Success, Tell the World!
Alright, we’ve got our test results. Technically we’ve have two sets of test results but the “compiled” test overwrote those from the first test. But what do we do with those test results?
  - task: PublishTestResults@2
    displayName: 'Publish test results'
    inputs:
      testRunner: NUnit
      testResultsFiles: '**/TestResults.xml'
    condition: succeededOrFailed()
This is the built in task for publishing test results. Of note here, is that the test runner is set to ‘NUnit’ (remember that Pester was set to an output format of ‘NUnitXml’) and the test results file matches the filename specified as the Pester output file.
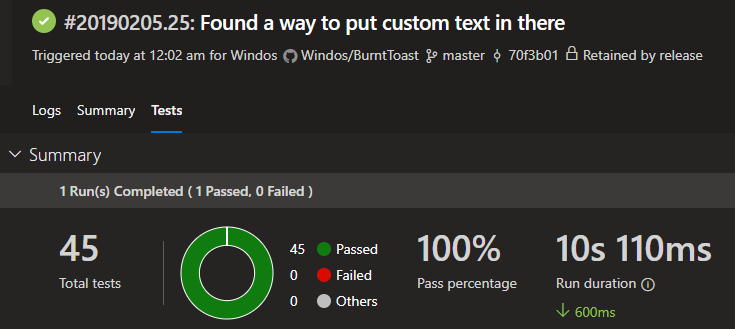
The task makes it so that the Azure Pipelines service itself is aware of the result, and can display them nicely on the builds web page.
Ok, that’s the test results, what about this code coverage business?
We’d previously downloaded a Bash script, so let’s go ahead and use it.
  - task: Bash@3
    displayName: 'Upload coverage to Codecov'
    inputs:
      targetType: 'filePath'
      filePath: ./codecov.sh
      arguments: -f coverage.json -t $(CODECOV_TOKEN)
Like the PowerShell task, this Bash task allows you to run commands or scripts inside of Bash. I’m pointing the file path at the .sh file we downloaded in a previous task, and passing in a few arguments. The first argument is the JSON file created using the PSCodeCovIo module and the second is the token to authenticate with Codecov (we’ll cover how to get, and set that soon)
Publishing, but Not for the World to See
There’s one final piece of house keeping to do before we can call our build pipeline complete, publishing build artifacts.
To carry out this task, I’m using the “Publish Pipeline Artifact” pre-defined task (which is in preview and different than the Publish Build Artifact task.)
  - task: PublishPipelineArtifact@0
    displayName: 'Publish compiled module artifact'
    inputs:
      artifactName: 'BurntToast'
      targetPath: ./BurntToast
    condition: succeededOrFailed()

  - task: PublishPipelineArtifact@0
    displayName: 'Publish Pipelines scripts as artifact'
    inputs:
      artifactName: 'PipelinesScripts'
      targetPath: ./Azure-Pipelines
    condition: succeededOrFailed()
I’m carrying out this task twice. The first run is targeting the entire ‘BurntToast’ directory which contains the compiled module, this will allow us to publish to external repositories in our Release Pipeline. The second run targets the ‘Azure-Pipelines’ directory which contains the zipped copy of the module, the release notes, version number, and most importantly the PowerShell script file that actually performs our release actions.
Note you can customize the name of these artifacts, and this will change how you interact with them in future pipelines.
We’ve now got a complete build pipeline definition, and build script… but it’s not touched Azure Pipelines at all yet. Before we dive into that, let’s take a short detour.
Can You Mark My Work?
We need to sign up for Codecov before we go any further. This will allow us to throw our code coverage data at them and have a nice report (and badge for our reademe).
Head to https://codecov.io and sign up. You do this by signing in with your Git provider and for me this was GitHub.
Unfortunately, I can’t replicate (or remember) the process 100% accurately, as I’ve already been through it, but you will have to grant Codecov certain permissions on your GitHub account and then select the specific repository your want to track coverage. It’s all fairly straight forward.
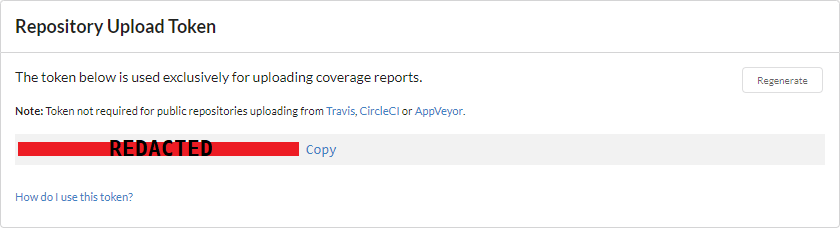
Once you’ve added your repository, head over to the settings and take note of your “Repository Upload Token”. We’ll be supplying this as a secure variable to Azure Pipelines soon.
Once everything is hooked up and your pipeline running (the next step, I promise) you’ll be able to see your coverage on Codecov itself.

But more importantly, you’ll get information directly within GitHub too. For instance it will start to let you know how much your coverage will change after merging a pull request.

Squeezing Through the Pipe(line)
Finally, it’s time to see the fruits of our labor. Head to the Azure DevOps site, https://dev.azure.com and sign in with your Microsoft account of choice.
This first thing you’ll need to do is create an “organization”. In short this is a name, which will be included and publicly visible in URLs, and the Azure region where your projects will be hosted.

Despite what that screenshot shows, my organization is “windosnz”.
Next, you’ll need to add a project. Give it a name (I like to match the name of my GitHub repo, ‘BurntToast’ in this case.) a description and set the visibility. I personally set mine to Public, so that I can link to it and share.
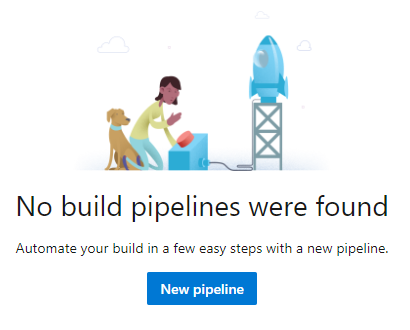
It’ll take a couple of moments to spin up your project, and when it’s done you’ll see a screen informing you that you’ve got no pipelines.
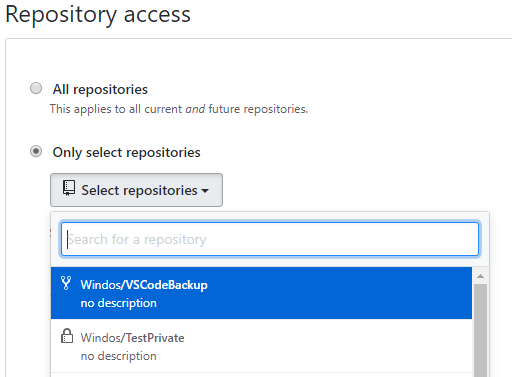
Here’s where I actually like to jump over to GitHub and begin the setup process from that end. Find Azure Pipelines in the GitHub Marketplace and install it. You’ll go through to a screen where you configure access, you can either grant Azure Pipelines access to all of your repos or just the one(s) you specify (this is the route I went).
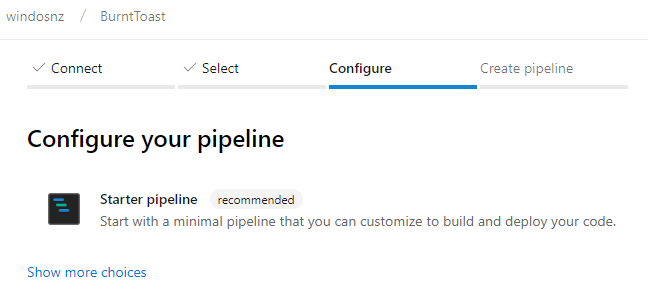
Click save and you’ll be taken back to Azure Pipelines. You’ll note that you’re part way through adding a new pipeline and that the “connect” step is already done. Select your repo and go through to configure. This automatically scans your repo to try and decide on the type of template to apply.
If we had used the default name for a pipeline YAML file (azure-pipelines.yml) it would detect and use that… but since we didn’t we’ll have to jump through some additional hoops.
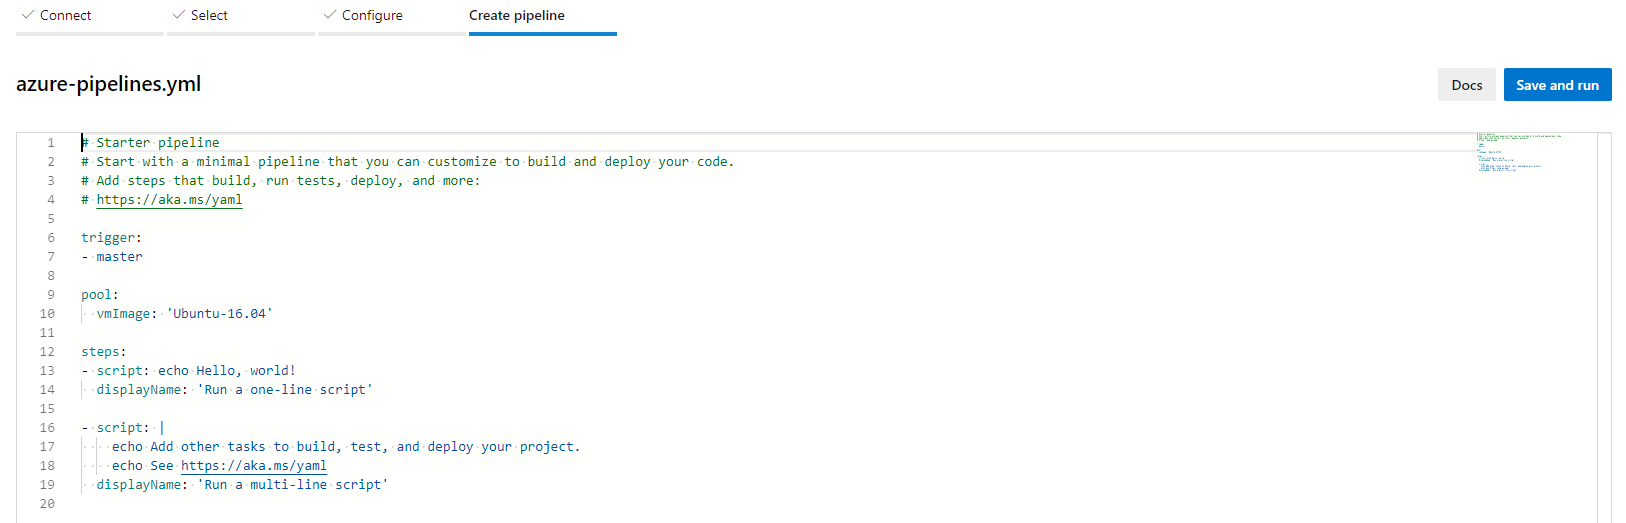
Once the option comes up, choose “Starter pipeline.”
It will saddle you with a default YAML file, and we’ve got no choice but to hit Save and Run. Don’t bother editing this file at all, we’re about to ditch it.
Unfortunately this will send through a commit to your repo on GitHub. You can get rid of this file once we’re done though. Once the commit is done, it’ll sit on configuring for a little bit and then it’ll show you that it’s running “your” build.

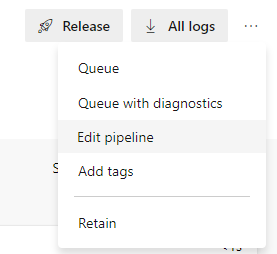
When this build finishes, head up top the top right of the page, click the three dots, and choose “Edit pipeline.”
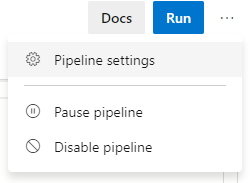
You’ll see the contents of the YAML file again. Ignore this and head back up to the three dots, and this time choose “Pipeline settings.”
See that YAML file path field? That’s where we specify which YAML file defines this pipeline. Go ahead and change that to point to your definition (you can press the icon to the right to navigate your repo and select the file.)
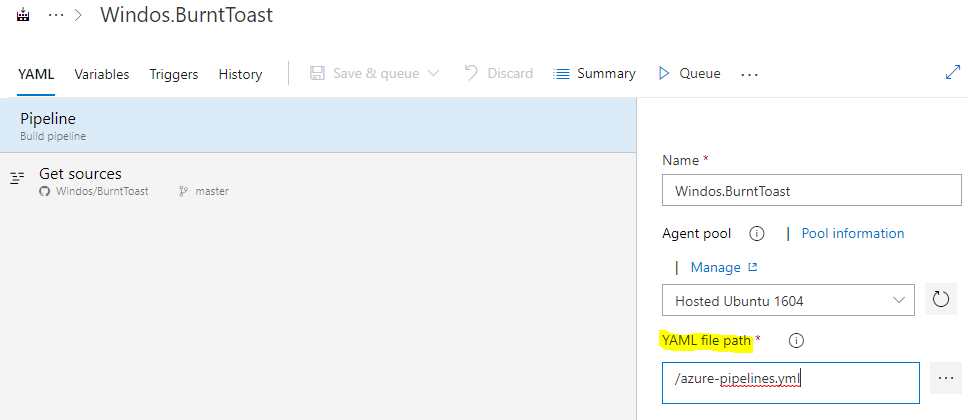
For me, this field becomes: Azure-Pipelines/build.yml
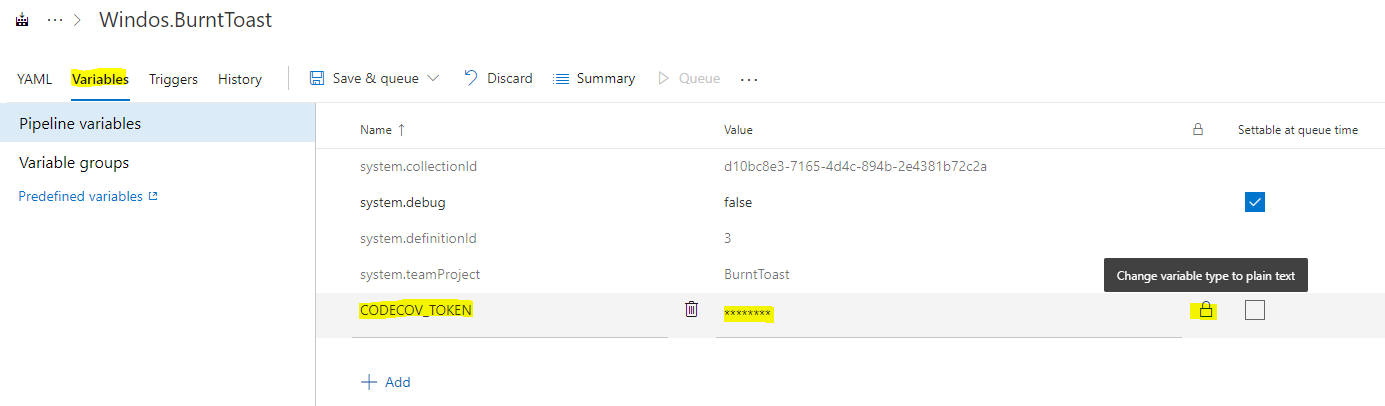
While we’re in the settings area, let’s provide that upload token for Codecov. Head to the Variables tab, and choose add. Give the variable a name, we used the name “CODECOV_TOKEN” in the definition and this needs to match. Also make sure that you click the padlock next to where you paste in the actual value of your token, this makes it a secret that cannot be viewed in plain text.
Click “Save & queue” to save your changes and queue and execution of your build pipeline.
Sit back and relax, believe it or not you’re done!

Notice that the job name and the display names of the tasks match what you set in your YAML file. Now… head back to GitHub and get rid of the azure-pipelines.yml file that this process added to your repo, you don’t need it and it’s just making a mess.
What’s Next?
I’d originally intended for this post to cover my entire Azure Pipelines journey… but at over 4,000 words I decided to make this a two (or three, gasp!) parter. This post covered build pipelines, and the next will cover release pipelines. That one will be a bit more visual, as you can only create your build through the web site at the moment, there is no support (at the time of writing) to edit the YAML yourself.
I also want to sum up my learnings. That may be at the end of the second post, or become a third post of it’s own.
Keep an eye out on Twitter for future posts!
By the way, we got our badges: