
Whew, I haven’t written a blog in a while now. I’ve missed it! I’ll have a soppy post in the new year about where I’ve been and what’s been keeping me so busy, but today I wanted to jot down some notes about a cool thing I started diving into at lunch.
GitHub announced a new feature a while back, Actions, an awesome tool for creating workflows to give your repositories super powers. It’s currently in beta (sign up here!), and originally only supported private repos… that’s cool, but I don’t have any (at least none that were included in the beta.)
This morning I got an email announcing the ability to use Actions on public repos. The only caveat being that you can only trigger them with pushes at the moment, as opposed to the wider set of events available in private repos like issues and releases.
I jumped in, checked out the samples, and naturally my first thought was “huh, I wonder if you can fire off random PowerShell with this?”
You better believe you can!
Jump to Action
First thing’s first, you’ll want to figure out where you’re going to store your custom action(s). In looking around it looks like there are three main routes people are taking here:
- Hosting the action within the repo that it’ll be run against
- Creating a generic repo to host multiple actions
- Creating a dedicated repo for each action
I’ve chosen to go down the generic repo path. I doubt any action I write will see wide usage, so creating a dedicated report seems over the top, but I do think I personally will use my own actions in multiple repos.
To that end, I spun up a repo called Deeds. This is where I’ll be collection any and all custom actions I write for use in GitHub Actions workflows.
Hello World
I wanted to start simple, and just see that I can run PowerShell with as little friction as possible. With that in mind, I created a Hello World action which just executes a ps1 file and outputs some text.
A basic custom action is incredibly easy to scaffold. Within its own directory start with a Dockerfile (no file extension) file. Here’s mine:
FROM mcr.microsoft.com/powershell:ubuntu-18.04

LABEL "com.github.actions.name"="Hello World"
LABEL "com.github.actions.description"="Write arguments to the standard output"
LABEL "com.github.actions.icon"="terminal"
LABEL "com.github.actions.color"="blue"

LABEL "repository"="https://github.com/Windos/Deeds"
LABEL "homepage"="https://king.geek.nz"
LABEL "maintainer"="Josh King (@WindosNZ)"

ADD entrypoint.ps1 /entrypoint.ps1
ENTRYPOINT ["pwsh", "/entrypoint.ps1"]
Of note here, the first line indicates the Docker image within which you action will run. I chose a Linux image from Microsoft that had PowerShell Core baked into it. This meant that I didn’t have to install PowerShell within the image myself (saving me a few lines of code, and a bit of run time.)
The name and the description should be self-explanatory. This is a bad example… but try to keep things unique!
I’ll be honest, I banged my head against the icon and colour for a while. For whatever reason I just couldn’t find the spot in the documentation where it listed what the valid options are. Don’t be like me, consult the proper docs.
Skip down to the bottom, and note the final two lines. This is where you call the action’s ps1 file. The part I was missing for the longest time was that I didn’t include ‘pwsh’ as part of the ENTRYPOINT. Turns out it that helps in the actual running of the script… I tried shebang’s but it didn’t seem to gel.
So what about the ps1 file? Honestly, there’s no real “magic sauce” in there.
Write-Host "The commit sha was: $env:GITHUB_SHA"

if ($args) {
    Write-Host "Your first argument was: $($args[0])"
} else {
    Write-Host "You supplied no arguments"
}
See, nothing too mystical in there. You do have access to the $args variable (which you can define when you come to the workflow). The thing I did struggle with for a little while is the environment variables that GitHub automatically created. You’ll see that I’ve used the GitHub SHA variable ($env:GITHUB_SHA) to get some dynamic information every time my workflow runs.
Get to Work(flow)
Alright, now let’s actually put our shiny PowerShell powered action to use, and check out the fancy graphical tool for defining a workflow.
As a test I’ve been using one of my neglected, barely started, projects No8WireMonitor.
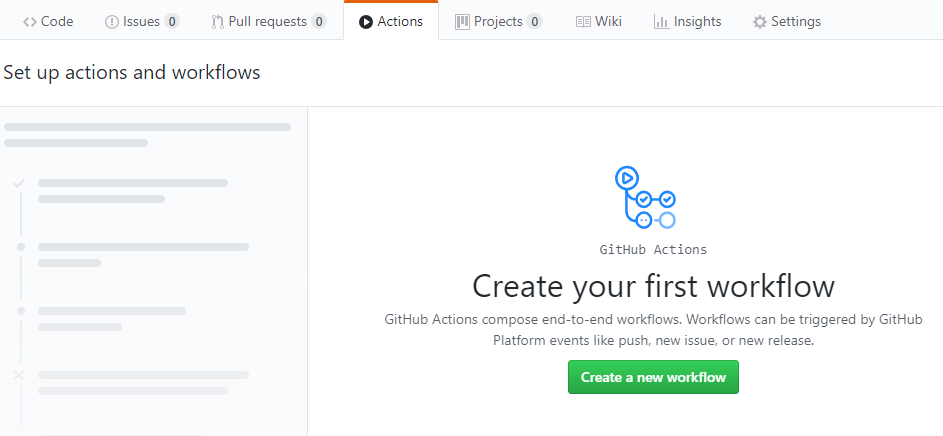
If you’re in the GitHub Actions beta, you’ll see an Actions tab to the right of the Pull requests one.

When you first go in there, you’ll be prompted to create your workflow, which will start a new commit where you’ll be editing a file called main.workflow.
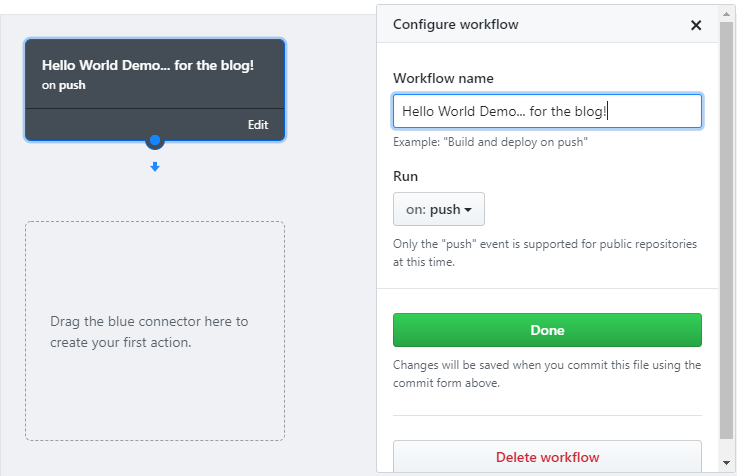
If you’re feeling keen, you can edit this file as text… but the visual editor is really nice. You’ll initially be prompted to drag down a little blue dot to a blank area for you first action but before doing that, consider clicking edit on the “New workflow” block so that you can rename it.
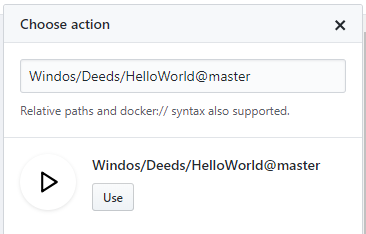
Now go ahead and drag down that blue dot and a blade will fly out to choose your action. There’s a list of featured one (which you can actually dig into the source of to find out how they work), but we want to use our custom one.
In order to use an action that’s not on the featured list, you’ll need to reference it in the form of username/repo/location@reference. The reference could be a branch, or the first seven figures in a commit’s SHA. If you’re using someone else’s action, you may want to consider picking a specific commit so that your workflow doesn’t break if they break something. I trust myself… for the most part, so I’m going to reference the master branch and my path will be Windos/Deeds/HelloWorld@master
Note that your nice display name, icon, and custom colour won’t show yet. Don’t worry, hit use…
Ahhh, that’s better!
The configure action blade will be open automatically, so tweak as needed. Strictly speaking, the Hello World action will fire as is, but I’ll add an argument here (you’ll see what I added in a later screenshot.) Note, that arguments split on spaces (/whitespace), so “hi there” would actually be two discrete arguments and $args[0] would only show hi.
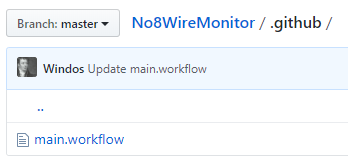
When you’re happy with your workflow, use the “Start commit” button up the top right to get it all saved and committed. If you ever need to get to the actual file, you can find it under the .github directory in the root of the repo.
Any time a commit is pushed to this repo now (including the one we just pushed to create the workflow itself), the workflow will trigger and out action will be executed.
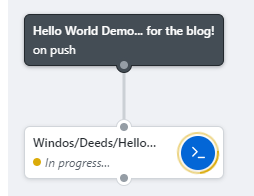
When you head back to the Actions tab, and you’ll find the history of each execution, and the block for the action will allow you to drill into the logs for the particular run.
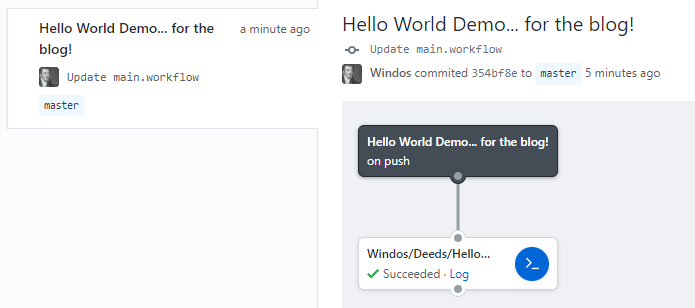
This is useful for diagnosing failures, but in this case it’ll also let us check the output of our script (it’s all the way at the bottom of the log.)

What I still can’t get over is that this action takes less than a minute to complete! The power of containers, eh?
Wrap Up
Are you using GitHub Actions? I’m really interested in hearing about how you’re using the feature.
No, this isn’t an actually useful action, but it was a good tooth cutting exercise and an interesting look into how easy it is to get PowerShell to work in a Linux flavoured world (after much stubborn frustration…)
I have a feeling I’ll be looking for any excuse to fire things up within Actions, even if it just ends up being for my own personal amusement. Who knows, there may even be a video or two on the topic over on TechSnips soon?